
Short Answer
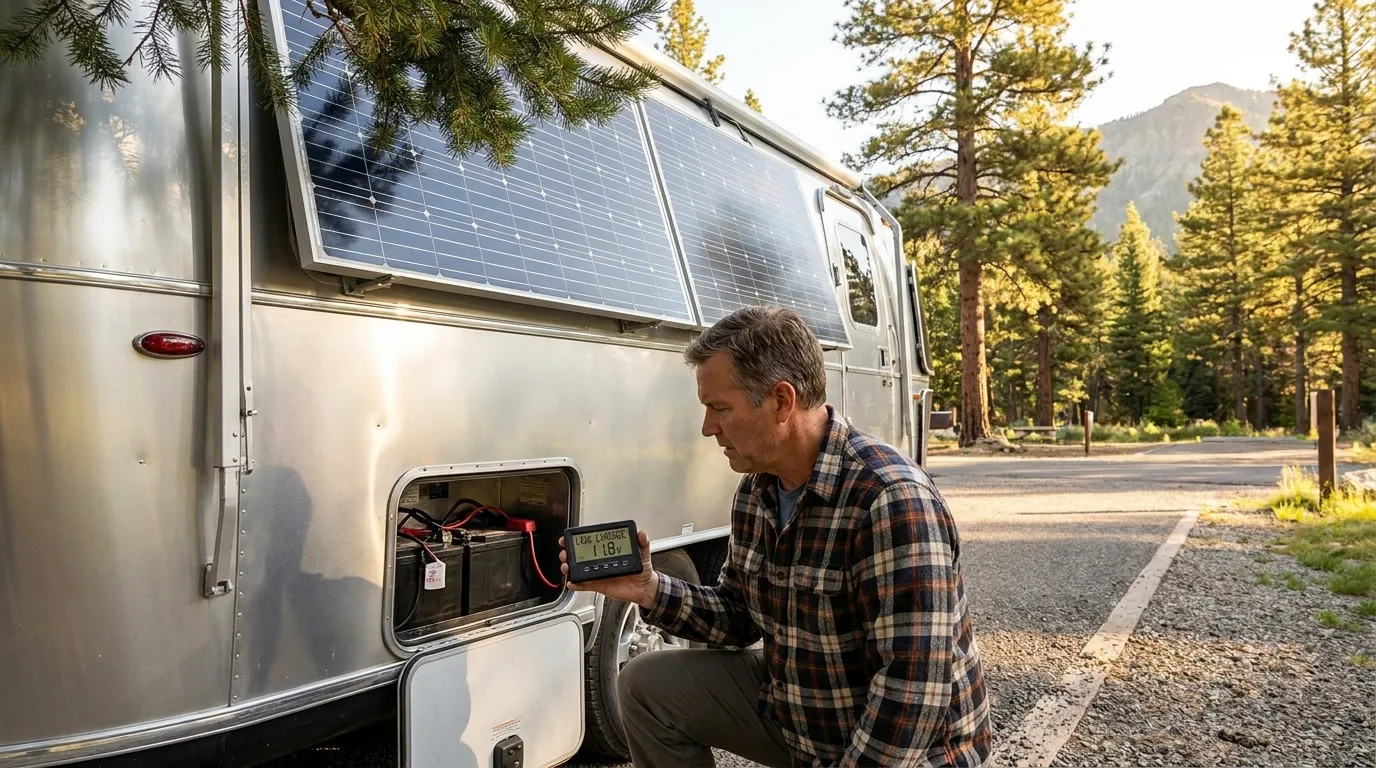
If your RV solar panel is not charging the battery, the most common causes include dirty or shaded solar panels, loose wiring, a blown fuse, a faulty charge controller, poor battery health, or incorrect system settings. Start by checking the battery voltage, inspecting all electrical connections, and confirming that the charge controller is operating correctly before replacing any components.
Introduction
A dependable solar charging system allows you to enjoy off-grid camping without constantly worrying about battery power. When that system suddenly stops charging your RV battery, everyday essentials like lights, appliances, water pumps, and electronic devices can quickly become unusable.
Fortunately, many charging problems are easier to diagnose than they first appear. In many cases, the issue is caused by a loose cable, excessive shade, a dirty solar panel, or a charge controller setting that needs adjustment rather than a failed solar panel.
This guide explains why an RV solar panel not charging battery problem happens, how to diagnose it step by step, and what you can do to restore your charging system safely. You’ll also learn how the solar charging system works, common warning signs, preventive maintenance tips, and when professional service is the better option.
Real-World User Experience
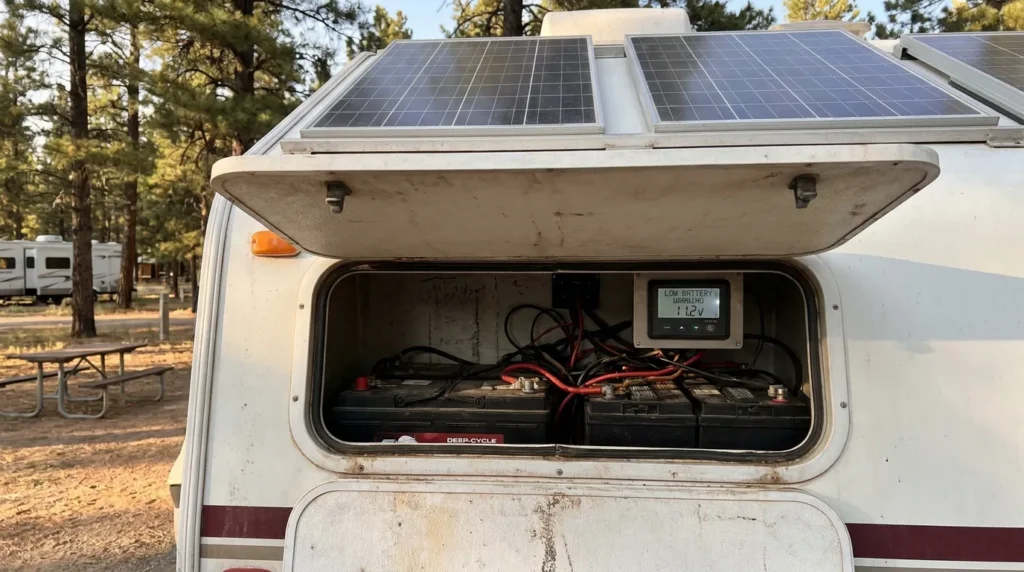
Many RV owners first notice this issue after their vehicle has been parked for several days. They expect the solar panels to keep the batteries charged, only to discover that interior lights are dim, the refrigerator displays low-voltage warnings, or the battery monitor shows a lower charge than expected.
Others experience charging problems after installing new batteries, replacing a charge controller, camping under heavy tree cover, or storing the RV during winter. Even a small wiring issue or a partially shaded panel can significantly reduce charging performance.
Quick Diagnostic Checklist
Before beginning detailed troubleshooting, go through this quick inspection list:
✔ Verify that the battery disconnect switch is turned on.
✔ Check the battery voltage with a digital multimeter.
✔ Inspect the solar panels for dirt, leaves, snow, or heavy dust.
✔ Look for shading from trees, antennas, air conditioners, or roof accessories.
✔ Make sure all wiring connections are secure and corrosion-free.
✔ Inspect all solar fuses and circuit breakers.
✔ Confirm that the charge controller is powered on and displaying normal operation.
✔ Check for warning lights or error codes on the charge controller.
✔ Verify that battery cables are tight and free from corrosion.
✔ Inspect the solar panel wiring for cuts, animal damage, or loose connectors.
Completing these simple checks often identifies the problem before more advanced testing is needed.
Common Causes of an RV Solar Panel Not Charging the Battery
1. Dirty or Obstructed Solar Panels
One of the most common reasons is reduced sunlight reaching the solar cells. Dirt, pollen, bird droppings, snow, leaves, or road grime can significantly decrease power production.
Why It Happens
Solar panels generate electricity from sunlight. Anything blocking that light reduces charging efficiency.
How to Identify It
- Visible dirt or debris
- Reduced charging during bright weather
- Lower solar input shown on the charge controller
Warning Signs
- Slow battery charging
- Battery percentage dropping during daytime
- Inconsistent charging performance
2. Shade Covering the Solar Panels
Even partial shading can dramatically reduce the output of many RV solar systems.
Why It Happens
Solar panels are connected through multiple cells. Shade on a small portion of the panel can affect the performance of the entire panel.
How to Identify It
- RV parked beneath trees
- Shadows from roof vents or air conditioners
- Charging improves after moving into direct sunlight
Warning Signs
- Charging works only during certain hours
- Solar production fluctuates throughout the day
3. Loose or Damaged Wiring
Solar systems experience constant vibration while traveling. Over time, electrical connections can loosen.
Why It Happens
Road vibration, moisture exposure, corrosion, and aging connectors gradually weaken electrical connections.
How to Identify It
- Loose connectors
- Corroded terminals
- Frayed wiring insulation
- Burn marks near connectors
Warning Signs
- Intermittent charging
- Charge controller turning on and off
- Voltage fluctuating unexpectedly
4. Faulty Solar Charge Controller
The charge controller regulates power flowing from the solar panel to the battery. If it fails, charging may stop entirely.
Why It Happens
Electronic components can fail due to age, overheating, incorrect wiring, moisture, or power surges.
How to Identify It
- Blank display
- Error messages
- No charging current despite full sunlight
- Incorrect battery readings
Warning Signs
- Battery never reaches full charge
- Controller frequently resets
- Charging stops without warning
Also Read: How to Test RV Battery With a Multimeter
5. Blown Fuse or Tripped Circuit Breaker
Many RV solar systems include protective devices between the panels, controller, and battery.
Why It Happens
Power surges, wiring faults, or accidental short circuits can open the circuit.
How to Identify It
- Inspect inline fuses
- Test continuity with a multimeter
- Check resettable breakers
Warning Signs
- Complete loss of charging
- Charge controller powers on but no current reaches the battery
6. Weak or Failing Battery
Sometimes the solar system is working correctly, but the battery can no longer accept or hold a charge.
Why It Happens
Lead-acid batteries naturally wear out after repeated charging cycles. Lithium batteries may also develop internal faults or enter protection mode.
How to Identify It
- Battery voltage drops quickly after charging
- Battery becomes warm during charging
- Battery fails a load test
Warning Signs
- Short runtime
- Slow charging
- Rapid voltage loss overnight
7. Incorrect Charge Controller Settings
Modern charge controllers often allow users to select different battery types.
Why It Happens
If the controller is set for AGM while using lithium—or vice versa—the charging profile may not match the battery’s requirements.
How to Identify It
- Compare controller settings with battery specifications
- Review installation manual
Warning Signs
- Battery never reaches full charge
- Charging stops too early
- Battery monitor displays unusual readings
Signs and Symptoms
Recognizing early warning signs can prevent complete battery failure and help you resolve the issue before it leaves you without power.
Common symptoms include:
- Battery percentage continues dropping on sunny days
- Interior lights appear dimmer than usual
- Refrigerator switches to low-voltage mode
- Water pump operates slowly
- Charge controller shows little or no charging current
- Battery monitor indicates low voltage
- Solar panels feel warm but produce little power
- Charging only works intermittently
- Batteries require frequent shore power charging
- RV electronics shut down unexpectedly
If several of these symptoms occur together, it’s worth performing a complete inspection of the solar charging system.
Also Read: RV Electrical Outlet Not Working but Breaker Not Tripped
Solar Charging System Troubleshooting Reference
| Problem | Likely Cause | Recommended Check |
|---|---|---|
| No charging at all | Blown fuse or broken wire | Inspect fuses and wiring |
| Very slow charging | Dirty panels or partial shade | Clean panels and move into full sunlight |
| Controller has no display | No battery connection or failed controller | Check battery voltage and wiring |
| Battery drains overnight | Weak battery or hidden electrical load | Perform battery load test |
| Voltage fluctuates | Loose electrical connection | Tighten and inspect all terminals |
| Battery never reaches 100% | Incorrect controller settings | Verify battery type configuration |
Step-by-Step Solutions
Step 1: Check Battery Voltage
What to Check
Measure the battery voltage before inspecting the solar panels. A healthy battery provides valuable clues about the charging system’s condition.
Tools Needed
- Digital multimeter
- Safety gloves
- Safety glasses
How to Fix It
- Turn off high-power appliances.
- Set the multimeter to DC voltage.
- Measure voltage directly at the battery terminals.
- Compare the reading with your battery manufacturer’s recommended voltage range.
- Record the reading before continuing with additional tests.
Expected Result
A battery within its normal voltage range indicates that the charging issue may be upstream in the solar system, while a very low reading suggests either insufficient charging or a battery that can no longer hold a charge.
Common Mistakes to Avoid
- Measuring voltage while large appliances are running.
- Testing with loose multimeter probes.
- Assuming a battery is fully charged based solely on voltage.
Step 2: Inspect the Solar Panels
What to Check
Examine each solar panel for anything that could reduce its ability to collect sunlight.
Tools Needed
- Soft microfiber cloth
- Mild soap and water
- Soft brush (if needed)
- Ladder with proper safety support
How to Fix It
- Turn off the solar charging system if recommended by the manufacturer.
- Check for dirt, bird droppings, leaves, or snow.
- Clean the panels using water and a soft cloth.
- Avoid abrasive cleaners or stiff brushes that may scratch the glass.
- Allow the panels to dry before testing the system again.
Expected Result
Clean panels should produce more power, especially during peak sunlight hours.
Common Mistakes to Avoid
- Cleaning hot panels with cold water.
- Walking directly on solar panels.
- Using harsh chemicals or pressure washers.
Step 3: Check for Shade
What to Check
Even a small shadow from a tree branch, roof vent, or air conditioner can reduce solar output.
Tools Needed
- Visual inspection
- Battery monitor or charge controller display
How to Fix It
- Park the RV in direct sunlight whenever possible.
- Trim overhanging branches if permitted.
- Recheck charging performance after moving the RV.
Expected Result
Charging current should increase once the panels receive unobstructed sunlight.
Common Mistakes to Avoid
- Assuming cloudy weather is the only reason for poor charging.
- Ignoring shadows that move across the panels throughout the day.
Step 4: Inspect Wiring and Connections
What to Check
Inspect every visible wire between the solar panels, charge controller, and battery.
Tools Needed
- Flashlight
- Screwdriver
- Digital multimeter
How to Fix It
- Tighten loose terminal connections.
- Replace damaged connectors.
- Clean corrosion from battery terminals.
- Repair or replace frayed wiring.
- Secure loose cables to prevent vibration damage.
Expected Result
A solid electrical connection allows charging current to flow efficiently.
Common Mistakes to Avoid
- Tightening connections while the system is energized.
- Ignoring small signs of corrosion.
Step 5: Test the Solar Charge Controller
What to Check
Verify that the controller is receiving power from the solar panels and sending power to the battery.
Tools Needed
- Digital multimeter
- Owner’s manual
How to Fix It
- Check the controller display for error messages.
- Measure the input voltage from the solar panels.
- Measure the output voltage to the battery.
- Confirm the controller is set for the correct battery type.
- Reset or update the controller if recommended by the manufacturer.
Expected Result
The controller should display solar input and charging activity during daylight.
Common Mistakes to Avoid
- Assuming the controller is defective without testing voltages.
- Using incorrect charging settings for your battery chemistry.
Step 6: Inspect Fuses and Circuit Breakers
What to Check
Locate every fuse and breaker in the solar charging circuit.
Tools Needed
- Fuse puller
- Multimeter
- Replacement fuses
How to Fix It
- Remove each fuse and inspect it.
- Test continuity using a multimeter.
- Replace blown fuses with the correct rating.
- Reset any tripped breakers.
Expected Result
Power should flow normally once the protection device is restored.
Common Mistakes to Avoid
- Installing a higher-rated fuse.
- Replacing a fuse without identifying the cause of failure.
Understanding Your RV Solar Charging System
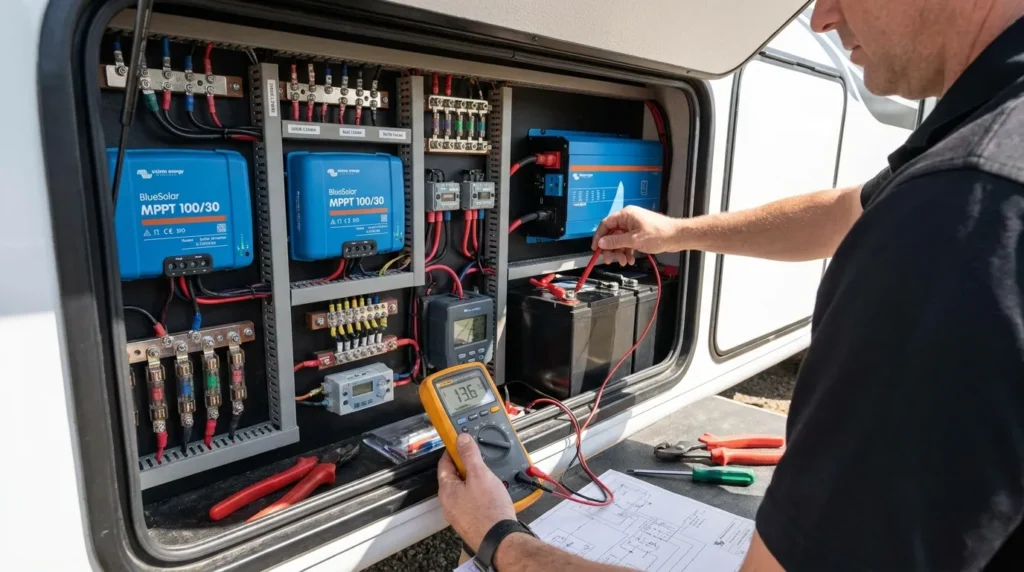
Knowing how each component works makes troubleshooting much easier.
Solar Panels
Convert sunlight into direct current (DC) electricity.
Charge Controller
Regulates voltage and current to protect the battery from overcharging.
Battery Bank
Stores energy for use when sunlight isn’t available.
Inverter
Converts DC electricity into AC power for household appliances.
Fuses and Breakers
Protect wiring and equipment from overloads and short circuits.
If one component fails, the entire charging process can be affected.
Safety Precautions
Before working on any RV electrical system:
- Disconnect shore power before servicing electrical components.
- Wear insulated gloves and safety glasses.
- Never short battery terminals with metal tools.
- Replace damaged wiring immediately.
- Follow the manufacturer’s wiring diagram.
- If you smell burning insulation or notice melted components, stop using the system until it has been inspected.
If you’re uncomfortable working with electrical systems, contact a qualified RV technician.
How to Prevent This Problem in the Future
Routine maintenance can help keep your solar charging system working efficiently.
- Clean solar panels every few weeks or after dusty trips.
- Inspect wiring at least twice a year.
- Tighten battery terminals during seasonal maintenance.
- Keep batteries fully charged during storage.
- Park in full sunlight whenever practical.
- Monitor battery voltage regularly.
- Test the charging system before long trips.
- Replace aging batteries before they begin to fail.
Preventive maintenance is usually less expensive than repairing damaged electrical components.
When Should You Call a Professional?
Many RV solar charging issues can be fixed with basic troubleshooting, but some situations require professional diagnosis.
Consider contacting a certified RV technician if:
- The charge controller repeatedly displays error codes after resetting.
- The battery becomes hot, swells, or leaks.
- Wiring insulation is melted or you notice a burning smell.
- Solar panels show visible cracks or water damage.
- The charging system still doesn’t work after checking the battery, wiring, fuses, and controller.
- You’re not comfortable testing electrical circuits with a multimeter.
Professional technicians have specialized tools that can quickly identify hidden wiring faults, damaged solar panels, or failing electrical components.
Common Mistakes RV Owners Make
Avoid these common mistakes to prevent unnecessary repairs and battery damage.
Replacing the Battery Too Soon
A weak battery isn’t always the cause. Many charging problems start with loose wiring, dirty panels, or an incorrectly configured charge controller.
Ignoring Partial Shade
Even if most of the panel is in direct sunlight, a small shadow can significantly reduce charging performance.
Skipping Routine Maintenance
Dust, road grime, and loose electrical connections gradually reduce charging efficiency if they’re never inspected.
Using the Wrong Battery Settings
Modern charge controllers should be configured for the correct battery type, whether you’re using flooded lead-acid, AGM, gel, or lithium batteries.
Waiting Until the Battery Is Completely Dead
Regular voltage checks can help identify charging problems before they leave you without power during a trip.
Conclusion
An RV solar panel not charging battery problem doesn’t always mean expensive repairs. In many cases, the issue can be traced to dirty solar panels, loose electrical connections, blown fuses, incorrect charge controller settings, or an aging battery.
Start with the simplest checks before replacing parts. Inspect the panels, verify battery voltage, examine wiring, and confirm that the charge controller is operating correctly. Regular maintenance and periodic inspections can help prevent charging problems and extend the life of your entire solar power system.
By following a logical troubleshooting process, you’ll often restore reliable charging and enjoy worry-free camping with a dependable source of renewable energy.
FAQs
1. Why is my RV solar panel showing power but not charging the battery?
This usually means the solar panel is producing electricity, but the power isn’t reaching the battery. Common causes include a faulty charge controller, blown fuse, loose wiring, or incorrect controller settings.
2. Can a bad battery stop my solar panels from charging?
Yes. A battery with damaged cells or severe internal wear may no longer accept a charge, making it appear as though the solar panels have stopped working.
3. How do I know if my RV solar charge controller is bad?
Common signs include a blank display, incorrect battery readings, repeated error messages, or no charging current during full sunlight despite proper panel voltage.
4. Do solar panels charge RV batteries on cloudy days?
Yes, but charging output is significantly reduced. Heavy cloud cover may produce only a fraction of the power generated on a clear, sunny day.
5. Should I leave my RV solar system connected all the time?
In most cases, yes. A properly installed solar system with a quality charge controller is designed to maintain the battery safely without overcharging.
6. How often should I clean my RV solar panels?
Inspect them regularly and clean them whenever you notice dirt, pollen, bird droppings, or other debris. Many RV owners find that cleaning every few weeks during frequent travel helps maintain peak performance.