

Quick Answer
If your RV water pump runs constantly with no leaks, the most likely cause is a faulty check valve or a failed pump pressure switch. Air in the lines, a worn pump diaphragm, or a loose fitting can also trigger this. The pump keeps cycling because it cannot hold pressure, even without a visible leak.
Why Is Your RV Water Pump Running Nonstop?
An RV water pump is supposed to run briefly, pressurize the system, then shut off. When it runs constantly with no leaks in sight, something is preventing the system from holding pressure.
This is one of the most frustrating RV plumbing issues because there’s no obvious drip or puddle to trace. The problem is usually internal, originating inside the pump itself, the valves, or a hidden connection you’d never think to check.
Left unaddressed, a constantly running pump can burn out the motor, drain your battery, and damage the pump head. In this guide, you’ll learn exactly what causes this problem, how to diagnose it step by step, and how to fix it yourself in most cases.
A Common Situation RV Owners Run Into
Many RV owners first notice this problem after a long trip or when the RV has been sitting unused for a few weeks. You open a faucet for a moment, close it, then hear the water pump keep running long after the faucet is off.
Sometimes the pump cycles on and off rapidly every few seconds without any faucet open. This rapid cycling pattern, sometimes called “short cycling,” is a key clue that your pressure switch or check valve is the culprit.
In other cases, the pump runs at a slow, steady pace even at 2 AM when no one is using water. That quieter, persistent hum can go unnoticed for hours and waste significant battery power.
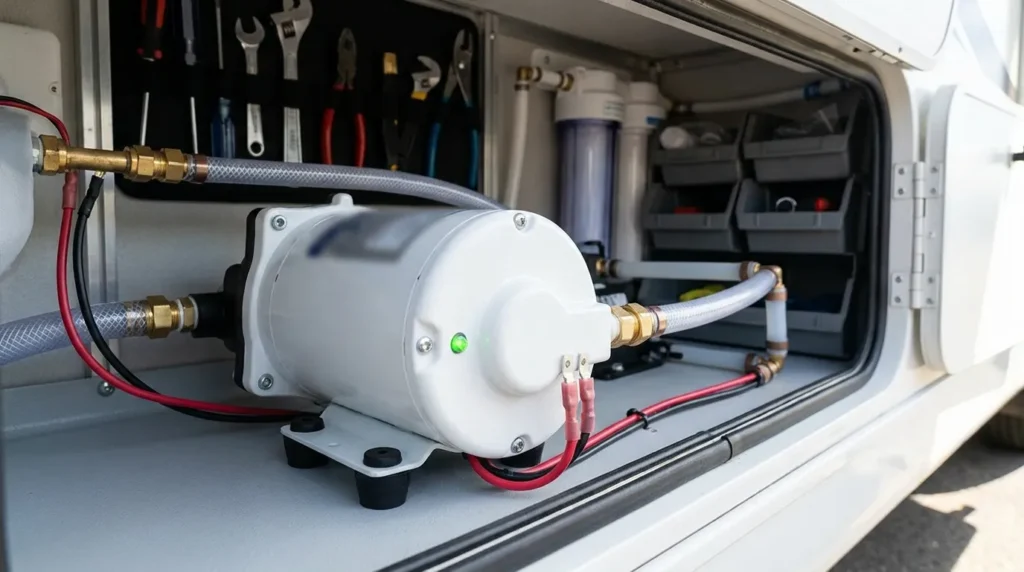
Quick Diagnostic Checklist : Where to Begin
Before diving into repairs, run through this quick checklist first:
- All faucets fully closed (including outdoor shower and toilet valve)
- Water heater bypass valve in the correct position
- Check visually under the RV, around connections, and inside cabinets for wet spots
- Listen for rapid on-off cycling vs. continuous steady running
- Note whether the pump runs with zero demand (no faucets open)
- Check the water tank level: is it actually empty?
Common Causes: RV Water Pump Runs Constantly With No Leaks
| Cause | How Common | DIY Fix? |
| Faulty check valve | Very Common | Yes (easy) |
| Worn pump diaphragm | Common | Yes (moderate) |
| Bad pressure switch | Common | Yes (moderate) |
| Air trapped in lines | Common | Yes (easy) |
| Internal pump bypass leak | Moderate | Yes (pump rebuild) |
| Loose fitting (hidden) | Moderate | Yes (tighten/reseal) |
| Failed accumulator tank | Less Common | Yes (easy) |
| Cracked water line inside wall | Less Common | May need a pro |
Detailed Breakdown of Each Cause
1. Faulty Check Valve
The check valve sits inside or near the pump and prevents water from flowing backward. When it fails, pressure bleeds back into the tank the moment the pump stops, so the pump never holds pressure and keeps restarting.
Signs: Pump starts and stops every 10–30 seconds without any faucet open. Water may dribble slowly back out of a faucet when the pump is off.
2. Worn Pump Diaphragm
Inside most RV water pumps (Shurflo and Flojet are the most popular brands) are flexible rubber diaphragms that move water through the pump head. Over time, these diaphragms crack or develop pinholes.
Signs: Reduced water pressure, pump runs continuously, visible wetness under the pump. Repair kits cost $10–$25 and are available for most pump models.
3. Bad Pressure Switch
The pressure switch is what tells the pump to turn off once the system reaches adequate pressure (typically 35–45 PSI). A stuck or failed switch never gets the “off” signal : so the pump runs indefinitely.
Signs: Pump runs constantly even with a full pressurized system. You can test the switch with a multimeter or by temporarily bypassing it (see Step-by-Step section below).
4. Air Trapped in the Lines
Air pockets in the water lines prevent the system from building consistent pressure. The pump senses low pressure, runs to compensate, but can never fully pressurize because air compresses instead of holding pressure.
Signs: Sputtering or uneven water flow from faucets. Often occurs after winterization or after the tank runs dry.
5. Internal Pump Bypass Leak
Even without an external drip, the pump’s internal valves can leak, allowing pressurized water to cycle back through the pump instead of holding in the lines. This is a common wear issue in pumps over 3–5 years old.
6. Loose or Improperly Sealed Fitting
A fitting that is slightly loose may not drip visibly but can still bleed pressure slowly. Check every push-to-connect and threaded fitting near the pump and along the lines behind cabinets.
7. Failed Accumulator Tank
Many RVs have a small accumulator tank that stores a cushion of pressurized water. This reduces how often the pump cycles. If the accumulator’s internal bladder fails, the pump loses its pressure buffer and runs far more frequently.
8. Hidden Cracked Line
Less commonly, a crack inside a wall or under the floor can leak water into insulation or wood without pooling visibly. If no other cause is found, consider pressure testing the system with a gauge to isolate the loss.
Signs and Symptoms to Watch For
- Pump runs without any faucets open
- Rapid on-off cycling (short cycling) every few seconds
- Low or inconsistent water pressure at faucets
- Water sputters or has air mixed in
- Pump runs louder than usual
- Battery drains faster than expected
- Wet insulation or slight moisture smell with no visible drip
Step-by-Step Troubleshooting and Repair
Step 1: Confirm No External Leaks
What to check: Walk the entire water system, starting under sinks, behind the toilet, at the water heater, at the tank inlet, and underneath the RV.
Tools needed: Flashlight, dry paper towels.
How to fix: Dry each connection, then press a paper towel against it while the system is pressurized. Any wet spot on the towel reveals a leak. Tighten or reseal the fitting.
Expected result: Elimination of external leaks.
Common mistake: Skipping the outdoor shower hookup and toilet water valve. Both are frequent, overlooked leak points.
Also Read: Why Is My RV Battery Draining Overnight
Step 2: Bleed Air From the Lines
What to check: Air pockets trapped after the tank ran dry or after winterizing.
How to fix: Open every faucet (hot and cold separately), the shower, and the outdoor connections. Turn the pump on and let water run from each until the flow is completely steady with no sputtering. Close faucets one at a time.
Expected result: Smooth, steady water flow; pump holds pressure after shutting off.
Step 3: Inspect the Check Valve
What to check: The check valve (also called a one-way valve) between the pump and the water lines.
Tools needed: Adjustable wrench, Teflon tape, replacement check valve ($5–$15).
How to fix: Turn off the pump and relieve pressure by opening a faucet. Remove the check valve (it unscrews from the line). Hold it up to light. The internal disc should only allow flow one direction. If it moves freely in both directions, it needs to be replaced.
Expected result: Pump builds pressure and shuts off, stays off between uses.
Step 4: Test the Pressure Switch
What to check: The pressure switch on the pump body.
Tools needed: Multimeter, optional replacement pressure switch or new pump.
How to fix: With the system pressurized, use a multimeter to test for continuity across the switch terminals. If the switch stays closed (shows continuity) when it should open at pressure, the switch has failed. On many Shurflo models, the pressure switch is not sold separately. In that case, a full pump head replacement or new pump is the fix.
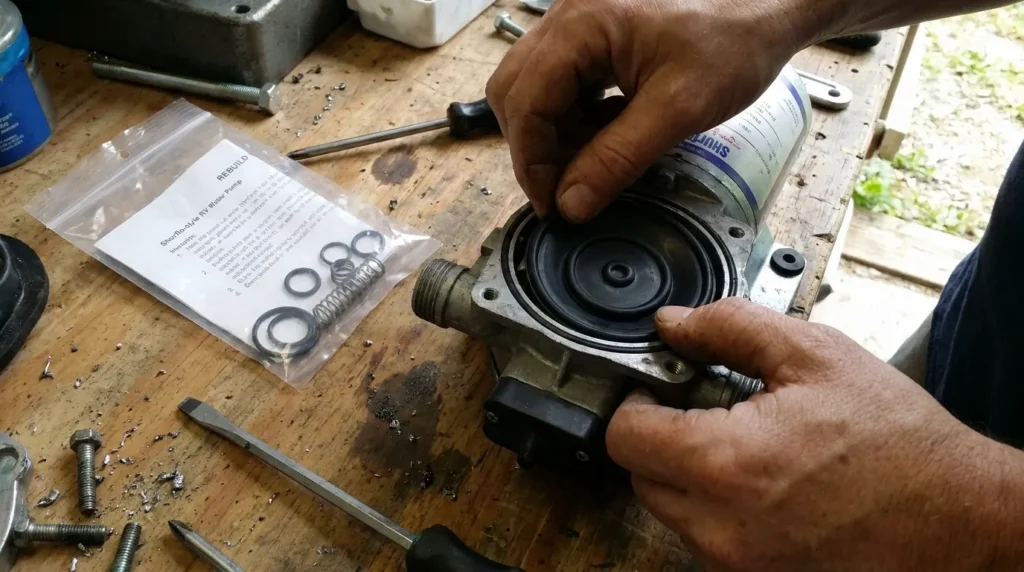
Step 5: Rebuild or Replace the Pump Diaphragm
What to check: The pump diaphragm and valve kit.
Tools needed: Screwdriver, pump rebuild kit specific to your pump model.
How to fix: Purchase the rebuild kit for your exact pump (Shurflo and Flojet both sell these). Remove the pump head screws, separate the housing, and replace the diaphragm and valves per the included instructions. Reassemble and test.
Expected result: Restored pressure-holding ability and reduced pump runtime.
Common mistake: Reusing old O-rings from the kit. Always install the new ones.
Step 6: Check and Replace the Accumulator Tank
What to check: The accumulator tank (if installed), usually near the pump.
Tools needed: Tire pressure gauge, air pump, replacement tank if needed.
How to fix: Disconnect the tank, remove the Schrader valve cap, and check air pressure. It should be pre-charged to about 30 PSI. If it reads zero or won’t hold air, the internal bladder is ruptured. A new accumulator tank ($20–$60) resolves the issue.
Understanding Your RV Water System
The RV water pump doesn’t work alone. It’s part of a connected system that includes:
- Fresh water tank: holds the supply of water
- Demand pump: pressurizes the system on demand
- Accumulator tank: buffers pressure between cycles
- Check valve: prevents backflow
- Pressure switch: controls when the pump starts and stops
- Water lines: connect everything to faucets, toilet, and water heater
- Bypass valves: used during winterization
When the pump runs constantly, the fault almost always traces back to one of these components failing to maintain pressure in the closed loop. Understanding this helps you narrow down the problem faster.
Safety Precautions Before You Start
- Always turn off the pump and relieve pressure before disconnecting any fitting. Opening a faucet bleeds the pressure safely.
- Disconnect shore power or turn off the battery disconnect before working near electrical connections on the pump.
- Never run the pump dry for more than 30 seconds because it can damage the diaphragm and internal valves.
- If your RV is connected to city water pressure, turn off the city water inlet before working on the pump system.
- When working under the RV, ensure it is on level ground with the wheels chocked.
How to Prevent This Problem in the Future
- Never let the water tank run completely dry. Running dry is a leading cause of diaphragm damage.
- Winterize properly using a pump protector, not just air blowout, to protect internal valves.
- Install a quality accumulator tank if your RV doesn’t have one. It dramatically reduces pump wear.
- Inspect all push-to-connect fittings annually and reseat any that feel loose.
- Replace pump rebuild kits every 3–5 years as preventive maintenance, not just when problems start.
- Check the accumulator tank’s pre-charge pressure once a year. It should hold 25–30 PSI.
- Use a pressure regulator when connecting to campground city water to prevent high-pressure damage.
Common Mistakes People Make
Replacing the Pump Before Checking the Check Valve
A check valve costs $5–$15. A new pump costs $50–$150. Many owners replace the pump first, only to find the old pump was fine and the check valve was the real issue.
Not Bleeding Air Before Diagnosing
Air in the lines mimics a failed pump or pressure switch. Always bleed the lines first. It takes five minutes and eliminates one of the most common causes.
Ignoring the Accumulator Tank
A failed accumulator tank won’t cause a total pressure failure. The pump just cycles far more often. Many owners ignore the cycling because water still flows, but the constant on-off wear burns out the pump faster.
Using Thread Tape on Push-to-Connect Fittings
Push-to-connect fittings seal with an O-ring, not threads. Adding Teflon tape to these can cause the fitting to leak instead of seal. Use Teflon tape on threaded NPT connections only.
Also Read: RV Battery Disconnect Switch Not Working
Related Topics Worth Reading
- RV water pump loses prime and won’t build pressure
- How to replace a Shurflo RV water pump
- RV water pressure too low: causes and fixes
- How to winterize an RV water system properly
- Best RV water pump accumulator tanks reviewed
When Should You Call a Professional?
Most RV water pump issues are DIY-friendly. However, consider calling a certified RV technician when:
- You’ve replaced the check valve, pump diaphragm, and pressure switch and the problem persists.
- You suspect a cracked line inside a wall. Locating and repairing this requires removing panels.
- You’re hearing the pump run but getting zero water flow, which could signal a blocked line or failed tank pickup tube.
- The pump is getting very hot to the touch, which suggests an electrical issue beyond a simple fix.
RV dealerships and mobile RV technicians can pressure-test the system to locate any hidden leak definitively.
Frequently Asked Questions
1. Why does my RV water pump run every few minutes with no faucets open?
This is called short cycling. It almost always means the system is losing pressure, usually through a bad check valve, a small internal pump leak, or a hidden fitting that isn’t fully sealed. Start by checking the check valve, which is the most common culprit.
2. Can a constantly running RV water pump damage itself?
Yes. Running continuously, especially under low-load conditions, causes excessive heat buildup and premature wear on the pump diaphragm and motor. If you notice the pump running nonstop, turn it off when not in use until the problem is fixed.
3. My RV pump runs but won’t turn off: is the pressure switch bad?
Possibly, but test the check valve first. A failed check valve is far more common and easier to fix. If replacing the check valve doesn’t resolve it, test the pressure switch with a multimeter for a stuck-closed condition.
4. How do I know if my RV water pump diaphragm is worn out?
Signs of a worn diaphragm include a pump that runs continuously, reduced water pressure, and occasional moisture visible under the pump housing. Most pump manufacturers sell rebuild kits with new diaphragms for $10–$25.
5. Does an accumulator tank stop the pump from running constantly?
An accumulator tank reduces how often the pump cycles by storing a reserve of pressurized water. If the accumulator’s bladder fails, short cycling gets noticeably worse. It doesn’t eliminate constant running caused by check valve or diaphragm issues, but it’s an important part of the system.
Final Thoughts
When your RV water pump runs constantly with no leaks, the answer is almost always hiding in the pressure system, not in a visible drip. The most common causes are a failed check valve, worn pump diaphragm, bad pressure switch, air in the lines, or a failed accumulator tank.
Start with the quick checklist and work through the steps in order. In most cases, a $5–$25 repair resolves the problem without replacing the entire pump.
The key is catching it early. A pump that runs constantly for hours can burn out in a fraction of the time a well-maintained pump would last. Turn it off when not actively using water, diagnose the root cause, and make the fix before your next trip.